Choosing the right exhaust fan is more practical than picking the loudest model or the cheapest option. A well-selected fan can reduce humidity, clear cooking odors, and protect walls from lingering moisture. However, room size, duct length, airflow resistance, and noise levels all affect real performance. A bathroom fan that works quietly in a small apartment may struggle in a larger family bathroom.
This guide, “10 Tips for Choosing the Right Exhaust Fan,” focuses on decisions that homeowners, contractors, and facility managers can verify. We will examine airflow ratings, energy use, installation requirements, controls, cleaning access, and ventilation standards. We will also consider the Fan Exhaust Fan terminology often used in product searches, even though it may sound repetitive. Check the specifications carefully.
A reliable choice begins with accurate measurements. Note the room’s dimensions, duct route, and available electrical connection before shopping. For kitchens, grease and heat require different considerations than bathroom steam. A fan should remove air effectively without creating an irritating roar. That balance is easy to overlook.
Real-world experience also matters. Filters clog. Ducts collect dust. Motors eventually lose efficiency. A model that looks impressive on a product page may disappoint after months of daily use. I have found that accessibility and maintenance deserve more attention than many buying guides suggest. Still, no single fan suits every building. Local climate, construction quality, and professional installation can change the result. Think carefully before choosing.
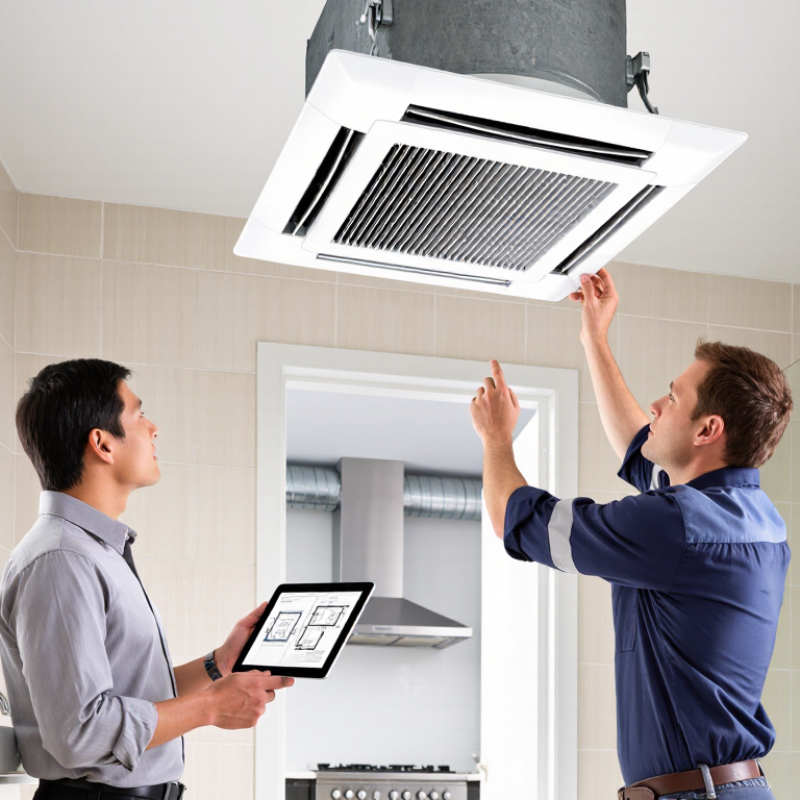
Before choosing an exhaust fan, define what it must remove. Bathroom fans control humidity, while kitchen fans handle heat, odors, and airborne grease. A workshop may require stronger airflow for dust or chemical vapors. Different problems need different fan capacities.
Measure the room’s length, width, and height. Then estimate the required airflow using the room volume and recommended air changes. This calculation provides a useful starting point, not a perfect answer. Door gaps, duct length, bends, and backdraft dampers can reduce performance. A small bathroom fan may work well with a short, straight duct, but struggle through a long flexible hose.
Location matters as much as airflow. Install a bathroom fan near the shower area, but keep electrical connections protected from water. In a kitchen, position the exhaust point close to the cooking source, with a smooth duct leading outdoors. Avoid exhausting into an attic, wall cavity, or ceiling void. That can trap moisture and create hidden damage. Check local building and electrical requirements before installation, and use a qualified professional when wiring or structural changes are involved. One detail is easy to overlook: the exterior outlet needs a weather-resistant cover and a functional damper. Without it, cold air, insects, or rain may enter the duct.

Match fan capacity to room size and ventilation requirements, not just the fan’s physical size. Measure the room’s length, width, and height to estimate its air volume. A small bathroom may need around 50–80 CFM, while a larger room often needs more. Kitchen ventilation usually requires higher capacity because cooking creates heat, grease, and moisture. Local building requirements should guide the final choice.
Tip 1: Measure twice. I once selected a fan from floor area alone and underestimated the ceiling height. The room stayed damp after showers. For longer duct runs, bends, or restrictive grilles, choose extra capacity because airflow can drop sharply.
Tip 2: Check the duct path. A powerful fan cannot perform well through a narrow, crushed, or poorly sealed duct. Short, smooth ducting usually delivers better results.
Tip 3: Consider air changes per hour for laundry rooms, workshops, and storage areas. These spaces may need continuous, moderate ventilation instead of short bursts.
Tip 4: Balance capacity with noise. An oversized fan may remove air quickly but create unnecessary sound and energy use. I prefer checking measured airflow, operating noise, and moisture levels together. This approach is not perfect, since real performance changes with wind, doors, and installation quality. Still, recording humidity before and after use provides useful evidence.
Choosing the right exhaust fan starts with the room, not the advertised airflow. Measure the bathroom size, duct length, bends, and outlet resistance. Short, straight ducts often suit axial fans. Long or curved ducts usually need centrifugal or mixed-flow designs. ASHRAE Standard 62.2-2022 recommends 50 CFM for intermittent bathroom exhaust, or 20 CFM for continuous operation. Check the tested airflow, not only the motor’s maximum rating. A powerful fan can still perform poorly through a restrictive duct.
Noise deserves equal attention. The Home Ventilating Institute rates sound in sones; lower numbers mean quieter operation. A rating near 1 sone feels unobtrusive, while 4 sones can dominate a small bathroom. Inspect the grille, damper, and mounting points, because vibration can create noise after installation. Select a timer or humidity sensor for shorter run times, but test the sensor during showers. Mine once stayed on too long after a cold, damp morning. That was useful, but not efficient.
Compare energy use by watts per CFM, rather than watts alone. ENERGY STAR residential ventilating-fan criteria use efficiency thresholds of 1.4 watts per CFM below 90 CFM and 1.8 watts per CFM at higher airflow. Choose a sealed, accessible motor housing and clean the grille regularly. Replace crushed flexible ducting. Verify that the fan’s rated airflow matches the installed system. The cheapest fan may cost more through noise, wasted electricity, and replacement work.
Compare fan types, typical noise levels, and estimated annual energy use before selecting an exhaust fan. The chart uses representative residential ranges; actual performance varies with airflow, duct length, installation, and operating time.
Estimated energy use assumes approximately 8 hours of operation per day. Noise values are typical sound-pressure ranges measured under comparable residential conditions and may change after installation.
10 Tips for Choosing the Right Exhaust Fan
Check the duct before comparing fan sizes. Measure its diameter, length, bends, and outlet location. Narrow ducts create resistance and reduce real airflow. Long, flexible ducting can also collect moisture and dust. I once treated a short duct as harmless, but the fan still performed poorly. The outlet grille was partly blocked. That small detail mattered. Choose a fan rated for the system’s actual resistance, not only its advertised airflow. Ask for airflow data at working pressure when available.
Confirm the airflow direction before installation. The fan should pull stale air from the room and discharge it outdoors. Reverse installation can spread moisture into walls or ceiling spaces. Check the arrow on the housing and inspect the backdraft damper. It should open freely and close when the fan stops. Installation compatibility deserves equal attention. Compare the cutout size, mounting depth, voltage, switch arrangement, and ceiling or wall support. Leave enough access for cleaning and future repairs. Follow local electrical and building requirements. A qualified professional should handle fixed wiring where required. My own mistake was ignoring service access; cleaning later became awkward and easy to postpone. A quieter fan is not always better if its duct connection is poorly sealed. Use suitable joints and secure them without crushing the duct. Small gaps can leak damp air and reduce performance.
| No. | Selection Dimension | What to Check | Practical Guidance | Why It Matters |
|---|---|---|---|---|
| 1 | Room Size and Air Changes | Measure the room length, width, and height, then determine the required air changes per hour. | For a bathroom, a commonly used design range is approximately 8–10 air changes per hour. Required airflow can be estimated as: room volume × air changes per hour ÷ 60. | A fan that is too small may not remove moisture and odors effectively, while excessive capacity can increase noise and energy use. |
| 2 | Required Airflow | Compare the fan's rated airflow with the calculated requirement. | Check the airflow rating in cubic feet per minute (CFM) or cubic metres per hour (m³/h). Use the value specified for the intended installation conditions rather than relying only on a free-air rating. | Actual performance can be lower when the fan works against duct resistance, bends, filters, grilles, or external pressure. |
| 3 | Duct Diameter | Match the fan outlet to the existing or planned duct size. | Common residential duct diameters include 100 mm, 125 mm, and 150 mm. Avoid reducing the duct immediately at the fan outlet unless the installation instructions specifically allow it. | A smaller duct increases air resistance, may reduce airflow, and can create additional turbulence and noise. |
| 4 | Duct Route and Length | Inspect the total duct length, number of bends, and whether the route is horizontal, vertical, or routed through a roof or wall. | Use the shortest practical route with as few bends as possible. Keep flexible ducting stretched and supported instead of allowing it to sag or sharply fold. | Long, rough, or highly bent ductwork creates pressure loss and can significantly reduce the delivered airflow. |
| 5 | Airflow Direction | Confirm that air enters through the room grille and exits outdoors through the discharge outlet. | Look for an airflow arrow on the fan housing or verify the direction in the installation instructions. Do not discharge damp air into a ceiling void, wall cavity, or attic. | Incorrect direction can prevent ventilation and may transfer moisture into building materials, increasing the risk of condensation and mold. |
| 6 | Backdraft Protection | Check whether the fan or external outlet includes a backdraft damper, and verify that it can open freely. | Use a properly fitted damper where reverse airflow, wind exposure, or shared ducting could be an issue. Keep the flap free from dust and obstructions. | A damper helps limit cold air, insects, odors, and unconditioned outdoor air from flowing back into the room. |
| 7 | Installation Compatibility | Confirm the required mounting location, cutout dimensions, housing depth, duct connection, and access for maintenance. | Measure the ceiling or wall opening before purchase. Verify whether the fan is suitable for ceiling mounting, wall mounting, or both, and whether the structure can support its weight. | A fan can have adequate airflow but still be unsuitable if its dimensions, mounting method, or duct connection do not match the installation site. |
| 8 | Electrical and Moisture Safety | Check the rated voltage, switch arrangement, grounding requirements, and suitability for damp or wet locations. | Follow local electrical regulations and the product installation instructions. In bathroom applications, position electrical components according to the applicable safety zones and use qualified electrical installation when required. | Correct electrical compatibility reduces the risk of shock, overheating, equipment damage, and non-compliant installation. |
| 9 | Noise Level | Compare the fan's sound rating, normally stated in sones or decibels, at the stated operating condition. | For bedrooms, bathrooms, and other quiet areas, select a lower-noise model and avoid restrictive duct layouts that can amplify turbulence. | Lower noise improves comfort and makes occupants more likely to use the fan consistently. |
| 10 | Controls and Maintenance | Consider the required control method, such as a wall switch, timer, humidity sensor, or occupancy sensor, and check access to the grille and filter. | Choose controls that match the room's use. Clean the grille and accessible components regularly, and inspect the duct outlet for lint, dust, or obstructions. | Automatic run-on or humidity control can improve moisture removal, while regular maintenance helps preserve airflow and operating efficiency. |
Choosing the right exhaust fan requires more than comparing airflow figures.
Controls shape daily comfort and energy use. A wall switch may suit a basic bathroom, while a timer prevents short, wasteful runs. Humidity sensors can respond automatically, but they may need calibration. Motion controls are convenient, though false activation can increase electricity use.
Check the control location carefully.
Wet areas need suitable electrical protection and professional installation. A backdraft damper helps prevent cold air, insects, and odors from returning through the duct.
Confirm that the fan’s airflow matches the room size and duct length. A powerful fan can still perform poorly through a narrow, sharply bent duct. That detail is easy to miss.
Maintenance should be simple enough to happen regularly.
Look for a removable grille, accessible wiring, and washable components. Dust buildup can create noise and reduce airflow. Inspect the duct, damper, and mounting points during routine cleaning.
Safety also includes overheat protection, secure connections, and correct ventilation around the motor. Never ignore unusual vibration.
Overall cost includes purchase, installation, electricity, cleaning, and replacement parts.
A cheaper unit may become expensive when its sensor fails or its grille cracks. Energy-efficient operation helps, but efficiency claims need practical context.
I would rather choose a modest fan that is easy to maintain than an impressive model that becomes neglected. My judgment is not perfect; room use, climate, and installation quality can change the result. Check those conditions before deciding.